On this page
- Setting Up ADB on Your Computer
- Step 1: Download Platform Tools
- Step 2: Enable Developer Options on Your Phone
- Step 3: Verify the Connection
- Going Wireless: ADB Over Wi-Fi
- Pair Your Device
- Connect
- Essential Device Commands
- Check Connected Devices
- Restart the ADB Server
- Reboot Your Device
- Open a Shell on Your Phone
- Check Your Android Version
- App Management
- Install an APK
- Uninstall an App
- List All Installed Packages
- Clear an App’s Data
- Force Stop an App
- Grant or Revoke Permissions
- Removing Bloatware Without Root
- The Key Command
- Step-by-Step Workflow
- If You Remove Something Important
- A Safer Alternative: Disable Instead of Uninstall
- Important Safety Notes
- File Transfers
- Copy a File to Your Phone
- Copy a File from Your Phone
- Copy an Entire Folder
- Screen Capture and Recording
- Take a Screenshot
- Record Your Screen
- System Tweaks and Hidden Settings
- Speed Up (or Disable) Animations
- Change Screen Density (DPI)
- Change Screen Resolution
- Explore All Available Settings
- Debugging and Diagnostics
- Stream Live Logs
- Generate a Bug Report
- Check Battery Health
- Check Storage Usage
- Input Simulation and Automation
- Simulate a Tap
- Simulate a Swipe
- Simulate Button Presses
- Type Text
- Sideloading Updates and ROMs
- Quick Reference Table
- Safety Tips and Common Pitfalls
- Frequently Asked Questions
- Do I need to root my phone to use ADB?
- Is ADB safe to use?
- Can I use ADB wirelessly?
- Will ADB commands survive a factory reset?
- How do I find the package name of an app?
- What should I do if adb devices shows nothing?
Your Android phone ships with dozens of apps you never asked for, settings that are buried three menus deep, and limitations that exist mostly because the manufacturer decided you do not need that level of control. ADB disagrees.
ADB, short for Android Debug Bridge, is a command-line tool that lets you talk directly to your Android device from a computer. It was built for developers, but the people who benefit from it the most are the ones who actually use Android every day: the enthusiasts who want to strip out carrier bloatware, the power users who want faster animations, and anyone who has ever wished they could just tell their phone what to do instead of tapping through seven screens.
You do not need to root your phone. You do not need a computer science degree. You just need a USB cable (or Wi-Fi), a few minutes of setup, and the commands in this guide.
Setting Up ADB on Your Computer
Before you run a single command, you need ADB installed on your computer and your phone configured to accept connections.
Step 1: Download Platform Tools
Google distributes ADB as part of the Android SDK Platform Tools package. Download the correct version for your operating system from the official Android developer site:
- Windows: Download the ZIP, extract it to a folder like
C:\platform-tools. - macOS: Download the ZIP and extract it, or install via Homebrew with
brew install android-platform-tools. - Linux: Download the ZIP and extract it, or use your package manager (e.g.,
sudo apt install android-tools-adbon Ubuntu/Debian).
Step 2: Enable Developer Options on Your Phone
- Open Settings > About Phone.
- Tap Build Number seven times. You will see a toast message confirming Developer Options are enabled.
- Go back to Settings > System > Developer Options.
- Toggle USB Debugging to on.
When you plug your phone into your computer and run your first ADB command, a prompt will appear on your phone asking you to authorise the connection. Tap Allow and check “Always allow from this computer” to skip this step in the future.
Step 3: Verify the Connection
Open a terminal (or Command Prompt on Windows), navigate to your platform-tools folder, and run:
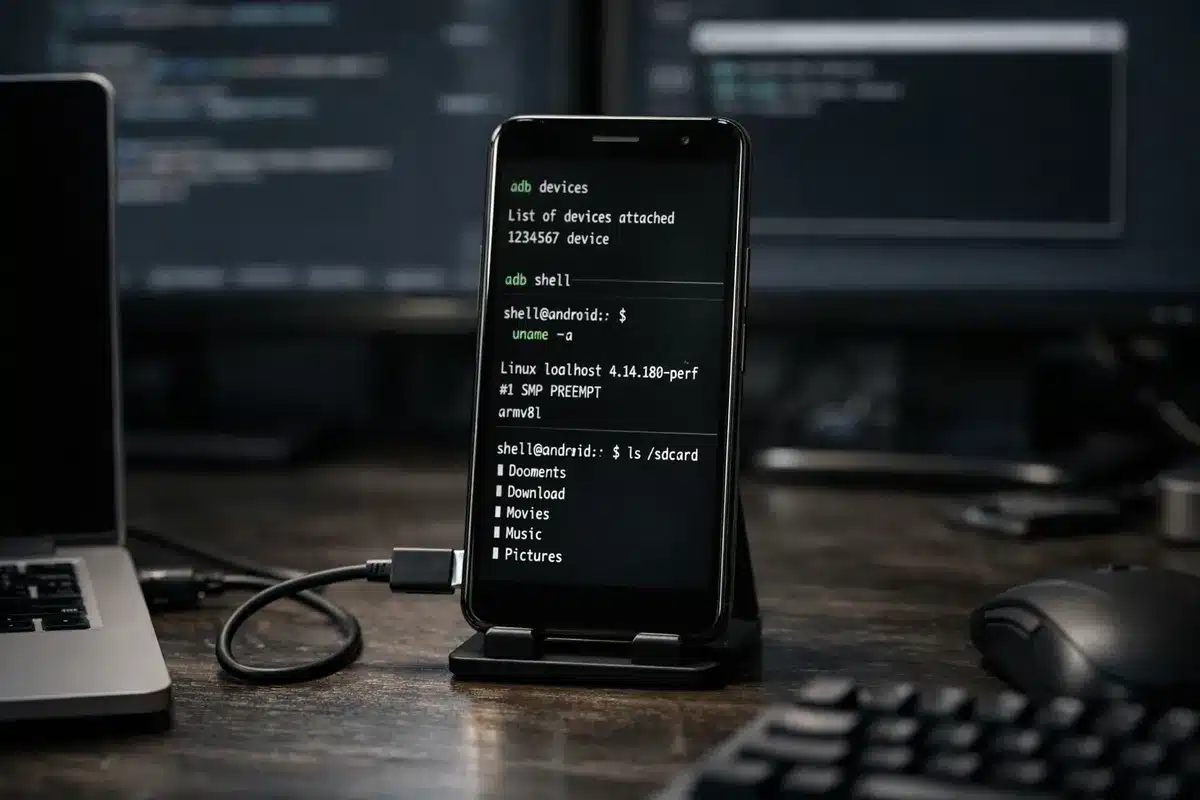
adb devicesYou should see output like this:
List of devices attached
XXXXXXXXX    device
If you see unauthorized instead of device, Check your phone screen for the authorisation prompt. If the list is empty, try a different USB cable or port.
Going Wireless: ADB Over Wi-Fi
If you are running Android 11 or later, you can ditch the USB cable entirely. Wireless debugging uses a pairing code system that is secure and surprisingly easy to set up.
Pair Your Device
- On your phone, go to Settings > System > Developer Options > Wireless Debugging and toggle it on.
- Tap Pair device with pairing code. Your phone will display an IP address, a port number, and a six-digit code.
- On your computer, run:
adb pair 192.168.1.100:37099Replace the IP and port with the values shown on your phone. When prompted, enter the six-digit pairing code.
Connect
After pairing, look at the main Wireless Debugging screen on your phone. It shows a connection IP and port (this port is different from the pairing port). Run:
adb connect 192.168.1.100:42135Confirm with adb devices. Your phone should now appear in the list with a network address instead of a serial number.
Both devices need to be on the same Wi-Fi network. If the connection drops, just re-run adb connect with the current port.
Essential Device Commands
These are the commands you will use constantly, regardless of what you are trying to accomplish.
Check Connected Devices
adb devicesAlways start here. If your device is not listed, nothing else will work.
Restart the ADB Server
If your device shows as unauthorized or gets disconnected randomly or simply refuses to appear, kill and restart the ADB server:
adb kill-server
adb start-server
This resolves the majority of connection issues.
Reboot Your Device
adb rebootYou can also boot directly into recovery or the bootloader:
adb reboot recovery
adb reboot bootloader
Open a Shell on Your Phone
adb shellThis drops you into a Linux-style command line running directly on your Android device. From here, you can run commands like ls, cat, top, and all the package manager commands covered later in this guide.
To exit the shell, type exit or press Ctrl+D.
Check Your Android Version
adb shell getprop ro.build.version.releaseUseful for confirming what version you are running before attempting version-specific commands.
App Management
ADB gives you far more control over apps than the Settings menu ever will.
Install an APK
adb install /path/to/app.apkTo update an app while keeping its existing data, add the -r flag:
adb install -r /path/to/app.apkUninstall an App
adb uninstall com.example.appYou need the package name, not the app’s display name. If you are not sure what it is, the next command will help.
List All Installed Packages
adb shell pm list packagesThis outputs every package on your device. To narrow it down, pipe the output through grep:
adb shell pm list packages | grep facebookTo list only third-party (user-installed) apps:
adb shell pm list packages -3Clear an App’s Data
adb shell pm clear com.example.appThis wipes all data and cache for the specified app, effectively resetting it to a fresh install. Useful when an app is stuck in a broken state and clearing cache through Settings does not fix it.
Force Stop an App
adb shell am force-stop com.example.appImmediately kills a misbehaving app. No confirmation dialogues, no “are you sure” prompts.
Grant or Revoke Permissions
adb shell pm grant com.example.app android.permission.ACCESS_FINE_LOCATION
adb shell pm revoke com.example.app android.permission.CAMERA
Handy for testing how an app behaves without certain permissions, or for granting permissions that the app does not normally request through its own UI.
Removing Bloatware Without Root
This is the single most popular reason non-developers use ADB. Every Android phone ships with apps you cannot uninstall through normal means: carrier utilities, duplicate browsers, and social media integrations you never signed up for. ADB lets you remove them.
The Key Command
adb shell pm uninstall -k --user 0 com.example.bloatwareThis uninstalls the app for the current user (user 0, which is the primary user) without touching the system partition. The app’s APK still exists on the device, but it is deactivated and invisible to you.
The -k flag preserves the app’s data and cache. This is intentional; it makes restoration easier if something goes wrong.
Step-by-Step Workflow
- List all packages to identify what you want to remove:
adb shell pm list packages | grep samsung- Research the package before removing it. Search for “is it safe to remove [package name]” to make sure it is not a dependency for something critical.
- Uninstall it:
adb shell pm uninstall -k --user 0 com.samsung.android.app.spage- Verify by checking your app drawer. The app should be gone.
If You Remove Something Important
If your phone starts behaving strangely after removing a package, you can restore it:
adb shell cmd package install-existing com.samsung.android.app.spageThis reinstalls the app from the system partition without needing the original APK.
A Safer Alternative: Disable Instead of Uninstall
If you are not sure about a particular package, disable it first. The app stops running but remains on the device, making recovery trivial:
adb shell pm disable-user --user 0 com.example.bloatwareTo re-enable it:
adb shell pm enable com.example.bloatwareImportant Safety Notes
- A factory reset will restore every package you removed using this method, since the APKs are still on the system partition.
- Some manufacturer apps are tightly coupled. Removing one Samsung or Xiaomi app can break another. If you notice issues, re-enable packages one at a time.
- Consider using Universal Android Debloater (UAD), an open-source tool that wraps these ADB commands in a GUI and categorises packages by safety level. It is available on GitHub.
File Transfers
If you have ever struggled with MTP drivers that refuse to cooperate, ADB file transfers are a breath of fresh air.
Copy a File to Your Phone
adb push /path/to/local/file.zip /sdcard/Download/Copy a File from Your Phone
adb pull /sdcard/DCIM/Camera/photo.jpg /path/to/local/folder/Copy an Entire Folder
adb pull /sdcard/DCIM/ ./phone-photos/ADB transfers are faster than MTP for large batches of files and do not require your phone to be in a specific USB mode.
Screen Capture and Recording
Taking screenshots and screen recordings through ADB gives you clean output without notification bars, watermarks, or the limitations of your phone’s built-in tools.
Take a Screenshot
adb shell screencap -p /sdcard/screenshot.png
adb pull /sdcard/screenshot.png ./
The first command captures the screen and saves it to your phone. The second copies it to your computer. You can combine them into a one-liner:
adb shell screencap -p /sdcard/screenshot.png && adb pull /sdcard/screenshot.png ./Record Your Screen
adb shell screenrecord /sdcard/demo.mp4Recording runs until you press Ctrl+C or the three-minute limit is reached. Pull the file to your computer afterward:
adb pull /sdcard/demo.mp4 ./To set a custom time limit (in seconds):
adb shell screenrecord --time-limit 120 /sdcard/demo.mp4System Tweaks and Hidden Settings
This is where ADB starts to feel like a superpower. You can change settings that are not exposed anywhere in the UI, and none of these require root.
Speed Up (or Disable) Animations
Android’s window transitions, app opening animations, and UI effects look nice, but they add perceived lag. You can speed them up or turn them off entirely:
adb shell settings put global window_animation_scale 0.5
adb shell settings put global transition_animation_scale 0.5
adb shell settings put global animator_duration_scale 0.5
Set each value to 0.5 for double speed, or 0.0 to disable animations completely. To reset to default:
adb shell settings put global window_animation_scale 1.0
adb shell settings put global transition_animation_scale 1.0
adb shell settings put global animator_duration_scale 1.0
Change Screen Density (DPI)
Lowering the DPI makes everything smaller, fitting more content on screen. Raising it makes everything larger. This is especially useful on tablets or large-screen phones.
Check your current density:
adb shell wm densitySet a new one:
adb shell wm density 400Reset to default:
adb shell wm density resetStart with small changes (e.g., 20-30 DPI at a time) to find a value that looks right on your device.
Change Screen Resolution
adb shell wm size 1080x2400Reset to default:
adb shell wm size resetLowering the resolution can improve battery life and performance on older devices, though the visual difference is usually noticeable.
Explore All Available Settings
You can browse every system, secure, and global setting on your device:
adb shell settings list system
adb shell settings list secure
adb shell settings list global
These commands output hundreds of key-value pairs. Combine with grep to find settings related to a specific feature:
adb shell settings list global | grep animationDebugging and Diagnostics
When something goes wrong with your phone, ADB can tell you exactly what happened.
Stream Live Logs
adb logcatThis streams the full system log in real time. It is extremely verbose, so you will want to filter it. To show only logs from a specific app or tag:
adb logcat -s "ActivityManager"To filter by priority level (e.g., only errors):
adb logcat *:EPress Ctrl+C to stop the stream.
Generate a Bug Report
adb bugreport > bugreport.zipThis creates a comprehensive diagnostic dump of your device, including logs, system state, and configuration data. It is exactly what device manufacturers ask for when you file a support ticket.
Check Battery Health
adb shell dumpsys batteryThis displays battery level, health status, temperature, voltage, and charging state. Useful for monitoring battery degradation over time.
Check Storage Usage
adb shell df -hShows disk usage in a human-readable format, broken down by partition.
Input Simulation and Automation
ADB can simulate touches, swipes, and key presses on your phone. This is useful for automation, accessibility testing, or just controlling your phone from your desk.
Simulate a Tap
adb shell input tap 500 1000The two numbers are x and y coordinates on the screen. You can find coordinates by enabling Pointer Location in Developer Options.
Simulate a Swipe
adb shell input swipe 500 1500 500 500This swipes from (500, 1500) to (500, 500), which is a swipe up gesture. Add a duration in milliseconds for a slower swipe:
adb shell input swipe 500 1500 500 500 300Simulate Button Presses
adb shell input keyevent 26Common key event codes:
| Code | Action |
|---|---|
3 | Home button |
4 | Back button |
24 | Volume up |
25 | Volume down |
26 | Power button |
82 | Menu button |
187 | Recent apps |
223 | Screen off |
224 | Screen on |
Type Text
adb shell input text "hello world"This types the specified text into whatever text field is currently focused. Spaces need to be replaced with %s in some Android versions:
adb shell input text "hello%sworld"Sideloading Updates and ROMs
If you are installing an OTA update manually or flashing a custom ROM, adb sideload is the tool for the job.
- Reboot your phone into recovery mode:
adb reboot recovery- On your phone’s recovery screen, select Apply update from ADB or ADB Sideload.
- Push the update file:
adb sideload /path/to/update.zipThe transfer and installation process will begin automatically. Do not disconnect your phone until it completes.
Quick Reference Table
Here is every command covered in this guide in one scannable table:
| Command | What It Does |
|---|---|
adb devices | List connected devices |
adb kill-server / adb start-server | Restart the ADB server |
adb reboot | Reboot the device |
adb reboot recovery | Reboot into recovery mode |
adb reboot bootloader | Reboot into bootloader |
adb shell | Open a shell on the device |
adb shell getprop ro.build.version.release | Check Android version |
adb pair <ip>:<port> | Pair for wireless debugging |
adb connect <ip>:<port> | Connect wirelessly |
adb install <apk> | Install an APK |
adb install -r <apk> | Reinstall and keep data |
adb uninstall <package> | Uninstall an app |
adb shell pm list packages | List all packages |
adb shell pm list packages -3 | List third-party apps |
adb shell pm clear <package> | Clear app data |
adb shell am force-stop <package> | Force stop an app |
adb shell pm grant <package> <permission> | Reboot into the bootloader |
adb shell pm revoke <package> <permission> | Revoke a permission |
adb shell pm uninstall -k --user 0 <package> | Remove bloatware |
adb shell pm disable-user --user 0 <package> | Disable an app |
adb shell cmd package install-existing <package> | Restore a removed app |
adb push <local> <remote> | Copy file to phone |
adb pull <remote> <local> | Copy file from phone |
adb shell screencap -p /sdcard/screenshot.png | Take a screenshot |
adb shell screenrecord /sdcard/demo.mp4 | Record the screen |
adb shell settings put global window_animation_scale 0.5 | Speed up animations |
adb shell wm density <value> | Change screen density |
adb shell wm size <WxH> | Change resolution |
adb shell settings list global | List global settings |
adb logcat | Stream live logs |
adb bugreport > bugreport.zip | Generate a bug report |
adb shell dumpsys battery | Check battery info |
adb shell input tap <x> <y> | Simulate a tap |
adb shell input swipe <x1> <y1> <x2> <y2> | Simulate a swipe |
adb shell input keyevent <code> | Simulate a button press |
adb shell input text "text" | Type text |
adb sideload <file.zip> | Sideload an update |
Safety Tips and Common Pitfalls
ADB is powerful, and that power comes with a few things worth keeping in mind:
- Always know the package before you uninstall it. A quick web search for the package name will tell you if it is safe to remove. Blindly uninstalling system packages can break features or cause boot loops.
- Keep your platform-tools updated. Google releases updates regularly. Running an outdated version of ADB against a new Android release can cause connection issues or missing features.
- Use
adb shell pm disable-userbeforepm uninstallif you are unsure. It is much easier to re-enable a disabled app than to troubleshoot a missing one. - Note your original values before tweaking density or resolution. If you set an unusable DPI, you can always reset by running
adb shell wm density resetfrom your computer. - Factory resets restore everything. Any package you removed via
pm uninstall -k --user 0will come back after a factory reset, since the APKs remain on the system partition.
Frequently Asked Questions
Do I need to root my phone to use ADB?
No. Every command in this guide works without root. ADB operates through a debug connection that Android provides natively. Root gives access to additional system-level commands, but the vast majority of useful things can be done without it.
Is ADB safe to use?
ADB itself is safe. The risk comes from the commands you choose to run. Uninstalling critical system packages, modifying the wrong settings, or flashing incompatible ROMs can cause problems. Stick to the commands in this guide and research anything unfamiliar before executing it.
Can I use ADB wirelessly?
Yes, if your phone runs Android 11 or later. Use the wireless debugging feature in Developer Options with the adb pair and adb connect commands described in the wireless section above.
Will ADB commands survive a factory reset?
It depends. System tweaks like DPI changes and animation speed adjustments will reset. Bloatware removed via pm uninstall -k --user 0 will be restored. App installs and file transfers, of course, remain on the device unless the reset wipes internal storage.
How do I find the package name of an app?
Run adb shell pm list packages to see all installed packages, and pipe it through grep with a keyword: adb shell pm list packages | grep spotify. You can also use apps like “Package Name Viewer” from the Play Store.
What should I do if adb devices shows nothing?
Try these steps in order: use a different USB cable (some cables are charge-only), switch USB ports, make sure USB Debugging is enabled, restart the ADB server with adb kill-server && adb start-server, and check that any required USB drivers are installed (Windows sometimes needs the OEM driver or Google USB Driver).

Sumit
ContributorHi, I'm Sumit, Being an introvert I have always been obsessed with technology-computers and reading dozens of posts to learn, find answers out of my curiosity. I love to write as I explore more.