Having two screens definitely makes a lot of difference in productivity.
You can have two full-size windows up and running or even more depending upon the monitor size.
But how do you start using any desktop computer as a second monitor for your laptop?
It’s very simple.
As the normal way for the second monitor is connecting via cable in that case your desktop computer will not be working.
What we are trying to do is there a Desktop computer working and there is one laptop, now you can use your laptop and make the desktop monitor as the second monitor.
In this article
Mirror Monitor on Same Network
( Using Wi-Fi or LAN cable )
On same network you can connect to second monitor wirelessly and wired both ways.
So the first thing you need to do is connect both the Desktop and Laptop on the same network or same router via Wi-Fi or LAN but it should be on the same network.
Second Monitor Setup
On second monitor where you want to show your monitor screen do the following steps
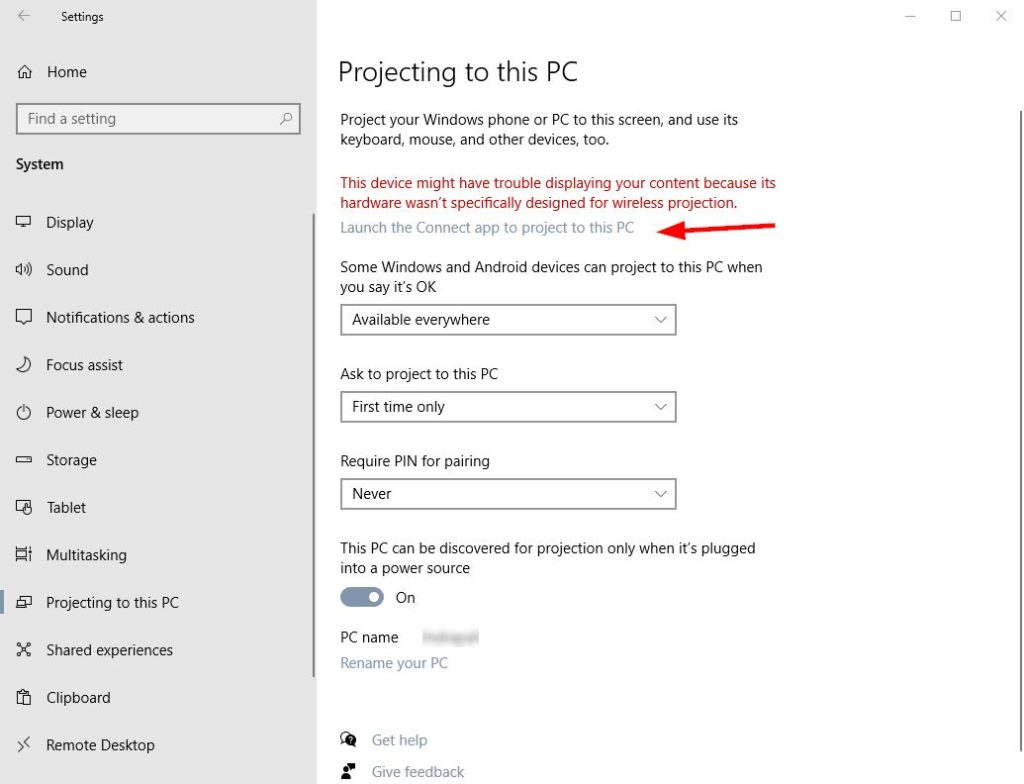
Start > Settings > System > Projecting to this PC
If you are doing this first time then probably you don’t have “Wireless Display” feature installed, then you will get the small heads up in the “Projecting to this PC” tab.
All you need to do is click Add optional feature and select “Wireless Display” from the list, it will take just a minute to download 1-2 MB file and install.
From current tab you can also control few things like,
- Can any device project to your device
- Ask to Project to this PC
- Require PIN for pairing
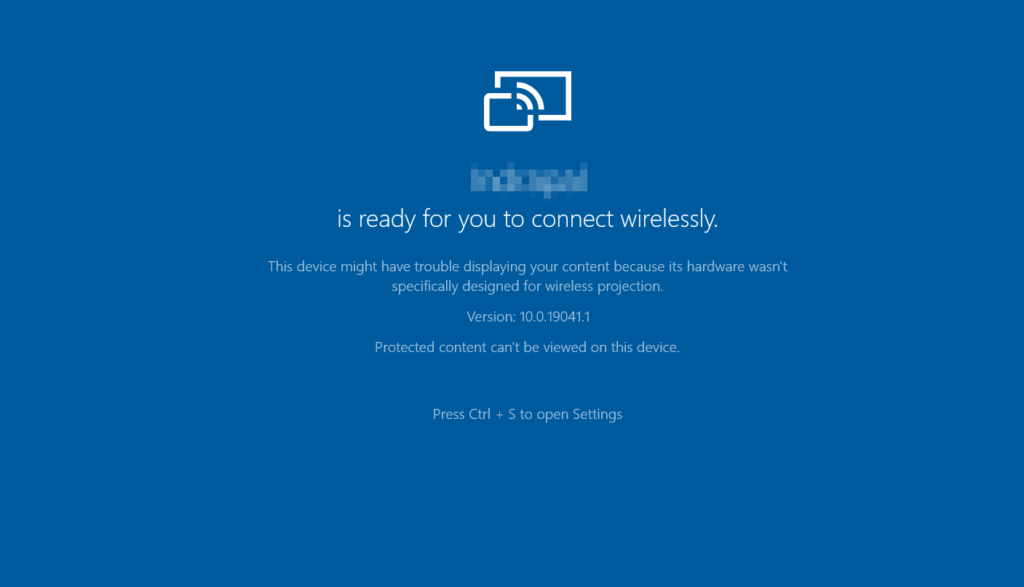
Now you can launch the Connect app by clicking the option “Launch the Connect app to project to this PC” or just search “Connect” in the Start menu.

Once you launch the connect app you will see a new window with blue background like this.

Your device is ready to be used as second monitor,
First Monitor Setup
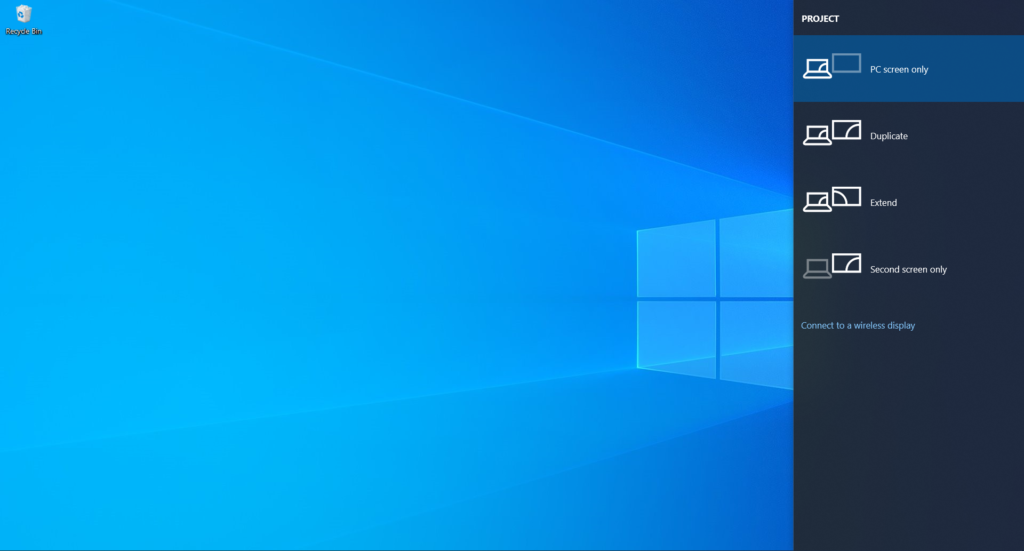
Now on the Laptop (first monitor) press Windows Key + P to open Project sidebar

Now tab the “Connect to a wireless display” option
You should now see the list of available device where you can project your PC screen,
You can also directly open this sidebar (listing wireless device where you can project your screen) by pressing Windows key + K 😉
Select the secondary monitor where we are running connect app,

that’s it your computer screen should be mirrored on the secondary display based on the option selected from the sidebar.
There are 4 ways you can use your secondary display
- PC Screen Only – Only use your current display which is the default
- Duplicate – Show your screen as a duplicate on the second monitor. Good for the screen sharing.
- Extend – Everyone’s favourite. Make it as a second display so you can drag anything between your current Laptop screen to the second screen.
- Second Screen Only – Only use the second screen. When you don’t want to work on a small screen or just dock your laptop and work on another second display.
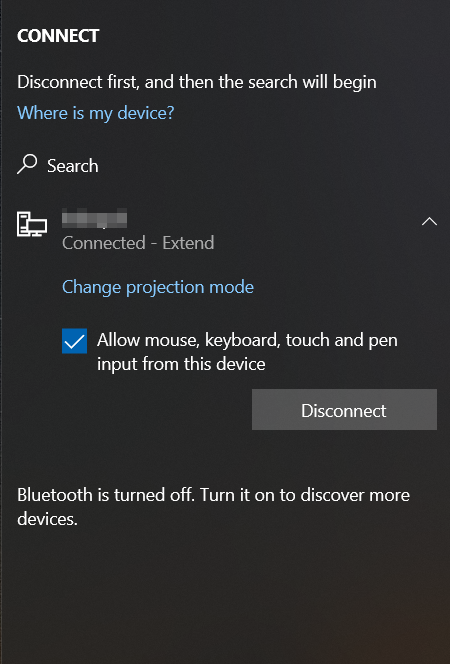
I will select the Extend option and now if you are on the same network as your desktop you will see something like this.
In our case, we are getting our Desktop computer
Mirror Monitor using HDMI
When using HDMI to mirror your monitor screen to secondary monitor this will be straight forward.
Connect the HDMI to both monitors after connecting HDMI your system will automatically detect the second monitor if not then
Press Windows key + P and select the mode in which you want to project your screen to the secondary monitor.


