Self-hosting n8n gives you complete control over your workflow automation while ensuring data privacy and cost savings. This comprehensive guide covers everything you need to know about setting up n8n on your own infrastructure, from basic requirements to advanced configurations.
Prerequisites and System Requirements for N8N
Before proceeding with any installation method, ensure your system meets these requirements:
Hardware Software
Hardware Requirements
- CPU: Dual-core processor (x86_64 or ARM64 architecture)
- RAM: 2GB minimum (4GB recommended for complex workflows)
- Storage: 10GB minimum (50GB recommended for production)
- Network: Stable internet connection
Software Requirements
- Ubuntu 18.04 LTS or later (22.04 LTS recommended)
- Debian-based distributions
- Windows 10/11 (with WSL2 for Docker)
- macOS (latest versions)
- Raspberry Pi OS (for Pi installations)
Required Software:
- Node.js: Version 20.19 to 24.x for npm installation
- Docker: The Latest version for containerised installation
- Git: For version control and backups (optional but recommended)
Method 1: Using Docker
Follow the official guide to install Docker on your system https://docs.docker.com/get-started/get-docker/
To start your Docker container, run the command in dettached mode so that you can close the terminal.
# (optional) pull images before starting
docker compose pull

# start your container
docker compose up -d

# stop container
docker compose down

# to update n8n run the following commands in order
docker compose pull
docker compose down
docker compose build
docker compose up -d
After running this, your n8n will be running on localhost:5678 if not using Cloudflare Tunnel, if using Cloudflare Tunnel, then your n8n editor will be available on your custom domain you entered.
https://gist.github.com/Amitind/f122ad24d18811eaa5f026ce1378639f
Setting up Cloudflare tunnel
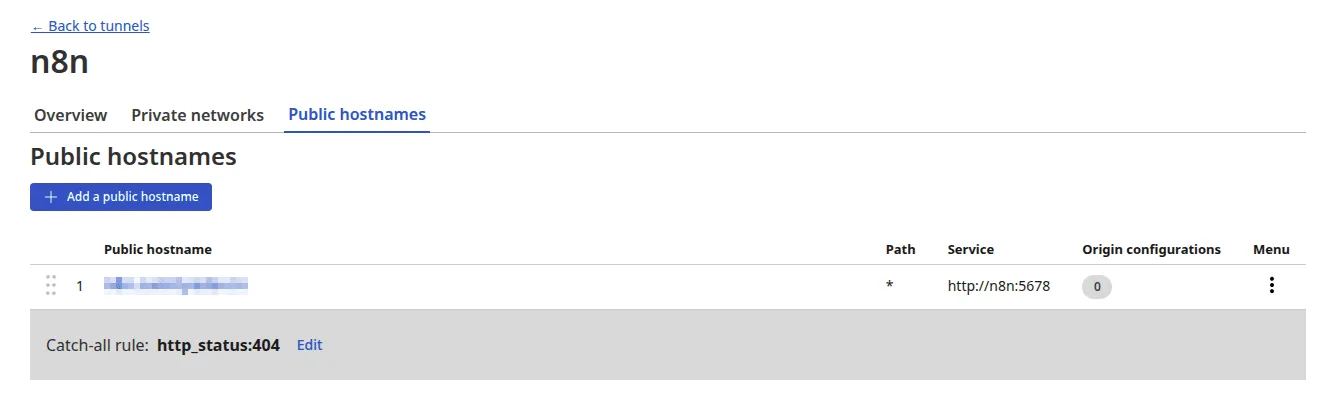
If you plan to use Cloudflare tunnel, then make sure to set up Tunnels by visiting https://one.dash.cloudflare.com/, then Networks->Tunnels,
As you can see in the service section, I am using n8n:5678 because Cloudflare and n8n are in the same Docker stack, so we can access n8n by container name container_name: n8n.
Also, add your domain in the Docker Compose file and the public hostname.
For the Cloudflare section, go to the Tunnels Overview tab and copy the access token and save it to the .env file with the key CLOUDFLARE_TUNNEL_TOKEN
And you are done with the setup.
Method 2: NPM
First, make sure you have installed Node.js and npm.
Visit https://nodejs.org/en/download to get installation instructions for your platform.
# verify installation

node -v
npm -v
Install and configure n8n
# Install n8n globally
npm install -g n8n

# Install PM2 for process management
npm install -g pm2

# Start n8n with PM2
pm2 start n8n

# Configure auto-start
pm2 save
pm2 startup

# to updated n8n
npm install -g n8n@latest
If you don’t want to use pm2, then you can skip the steps, mentioning just install n8n globally and start the n8n server.
You can start the n8n server with a public tunnel so that you can integrate third-party services in your n8n workflows, just make sure to keep it secure.
# Install n8n globally
sudo npm install -g n8n

# Start n8n server
n8n start

# Start n8n with tunnel
n8n start --tunnel
Now visit localhost:5678 to access the n8n editor.

Amit loves new tech and apps that make life easier, he writes about apps, games and useful websites on TheTechBasket.