Getting full permission of files in Windows can be complex. Some method involves commands or requires additional software to be installed but it can be done in an easier way.
If you need to access system-level files and folders Windows will not allow you to do that for security reasons. Sometimes you also need to get permission for files and folders created by another user.
This can even happen to any file or folder in your Pendrive or hard drive sometimes and you will not be able to delete or move the files.
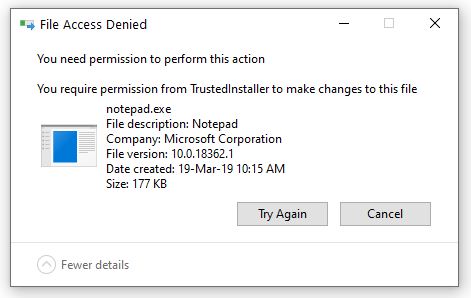
What happens when you take any action on files not under your permission you will get file access denied warning like below
The solution is to take ownership of those folders to perform any action. To take ownership of files there are two ways.
First is you need to follow official instructions which take several steps to modify user permission. Second is use “Take Ownership” windows utility which will do all the first method actions for you in one click.
First, we will explain the second way which is easy and fast for most people. To know the official way through already available option skip to the next section.
In this article
How to Add ‘Take Ownership’ in Right Click Context Menu
Download Take Ownership zip files
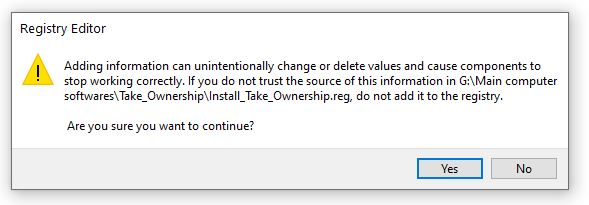
Double click on Install Take Ownership and hit yes when asked for it will modify the registry.
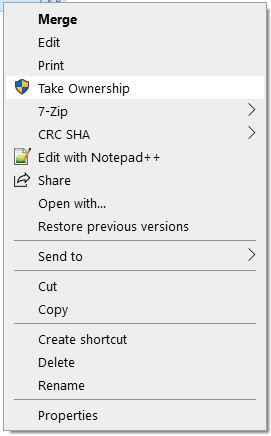
Right Click on any folder select take ownership to start using
When you install it, it’s get added into the registry which provides the option in your right-click context options.
How to Use ‘Take Ownership’
Once it’s installed and available in the right-click context menu.
Goto the files or folder for which you need to take access to right-click and select take ownership. It will ask administrator access, allow it and depending on the total number of files it will run certain commands in command prompt and now you have complete access over files. After getting access you can move, delete the files or folders without any warning.
How to Remove ‘Take Ownership’
In the downloaded zip file double click on Uninstall_Take_Ownership.reg file and hit yes to remove the option. Whenever you need it again just double click on install take ownership.
Steps to Take Permission of Any Folder without any software
To follow these instructions you don’t need to download anything.
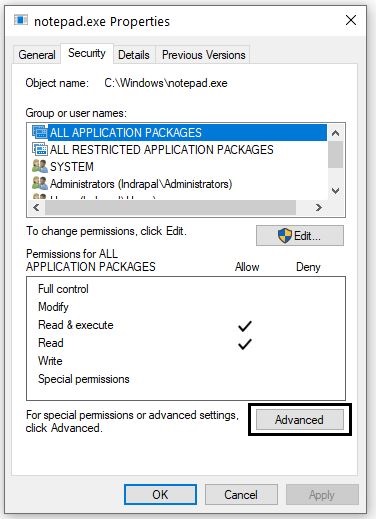
Right-click on file to open properties and click on the Security tab
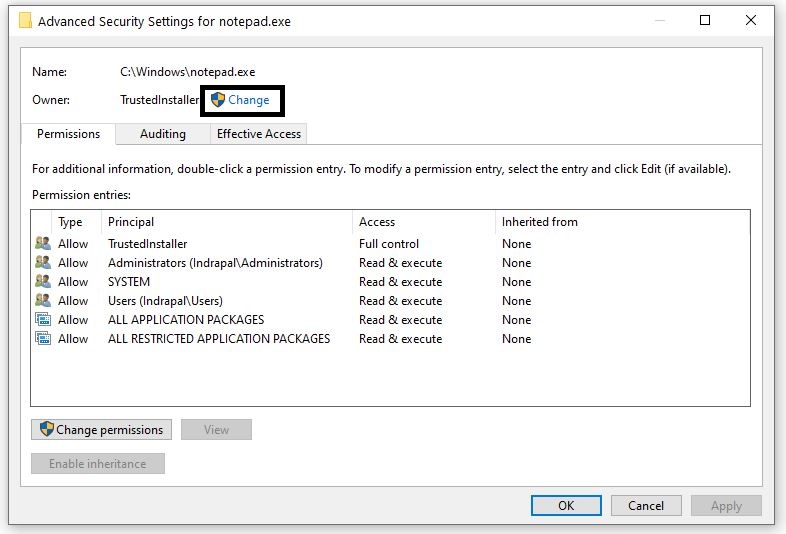
Click on the Advanced Button which will open the Advanced Security Settings for your file
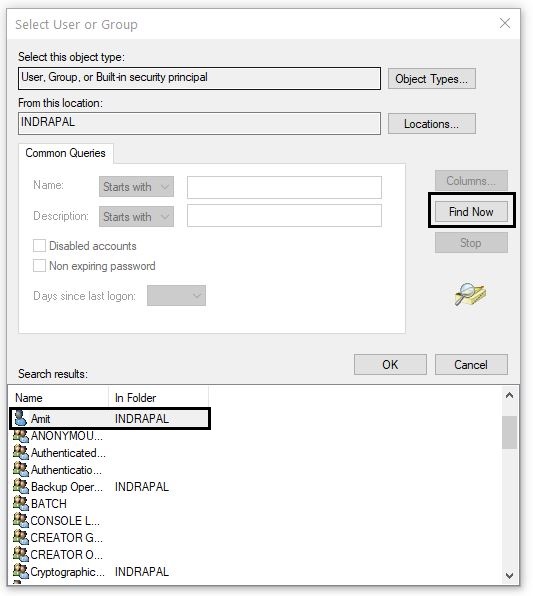
Click on Change under Owner and then again click on Advanced button which will open Select User or Group like below
Click on Find Now then select your User Account and press OK then again OK
On the Advanced Security Settings Page click Apply and OK to complete the step.
Note: if you’re taking ownership of a folder, you can check the Replace ownership on subcontainers and object option in the Advanced Security Settings page
Now we need to get full control over the permission of a file.
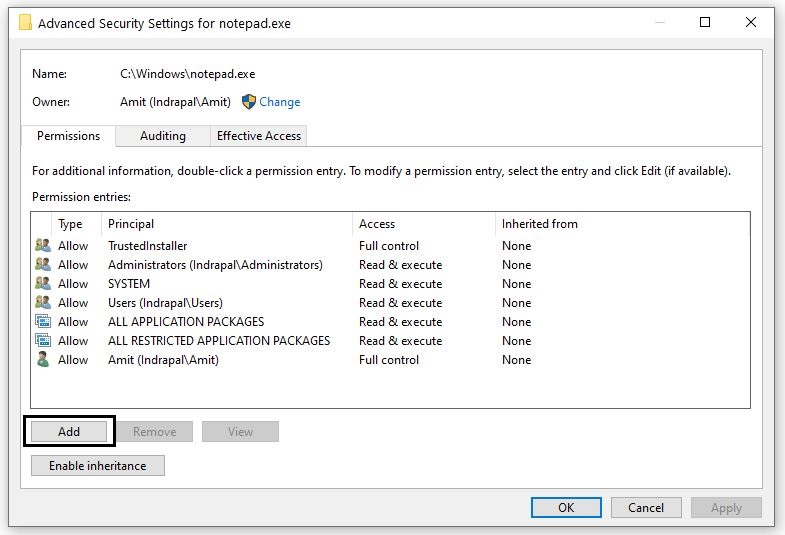
Follow the same steps as above Open Properties of the file, under security tab click on Advanced button to open Advanced Security Settings Page
This time click on Add button (as highlighted in the image)
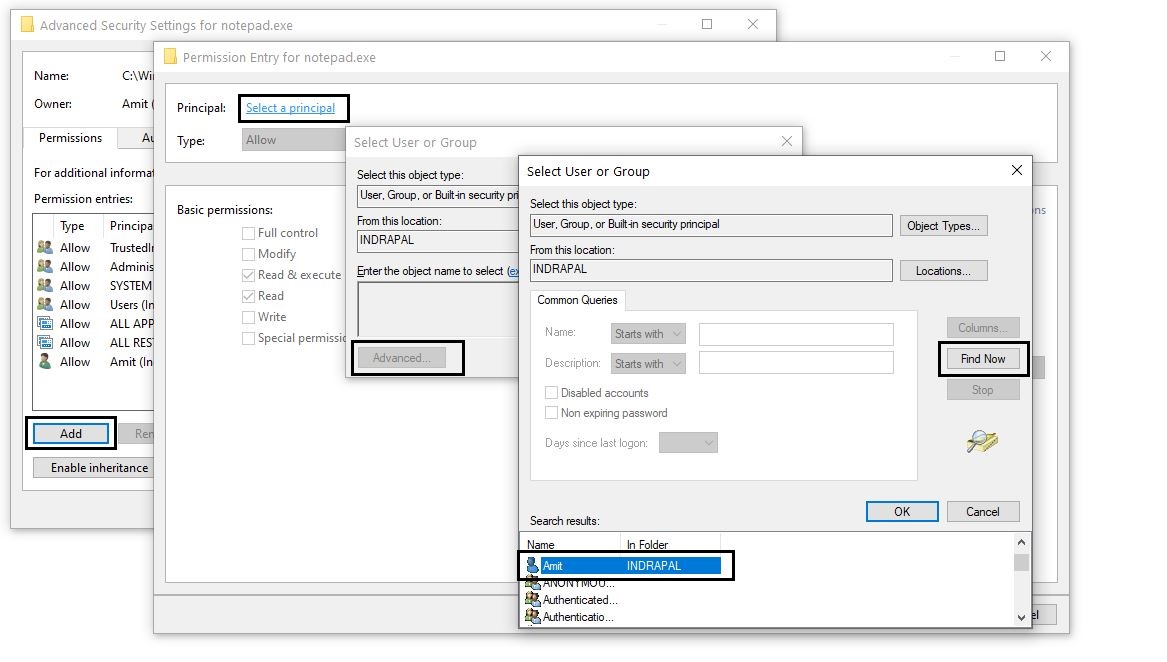
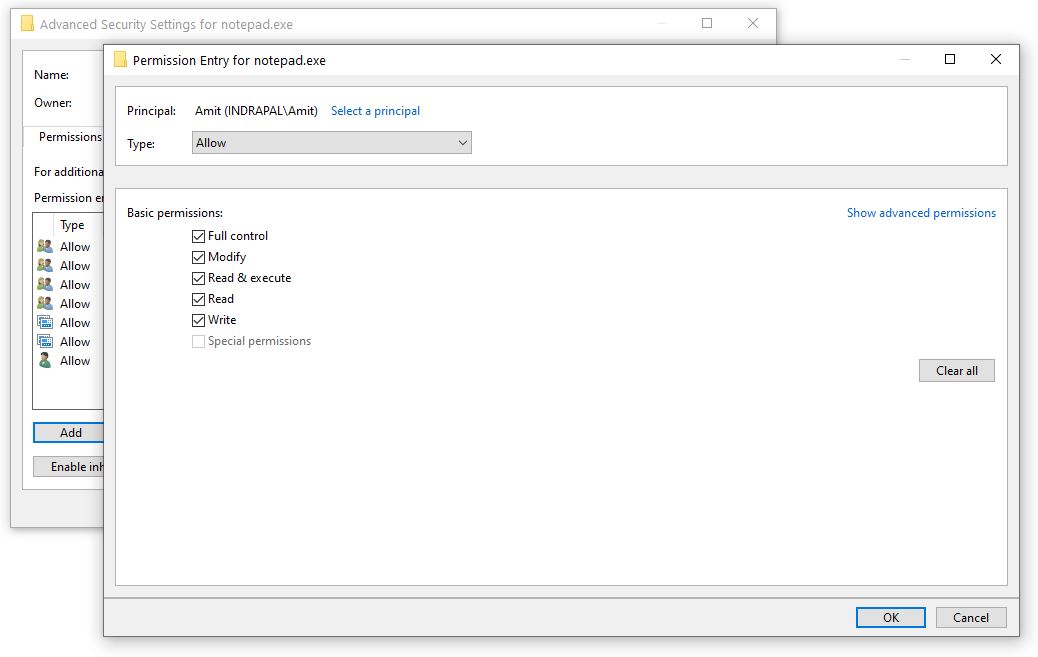
Clicking on add button will open Permission Entry page,
Click on Select a principal then advanced button.
In the Select User or Group Page click Find Now and select your user account and press OK till back to the Permission Entry page
Now in the Permission Entry page, you will have the option to tick full control to get all permission related to read, write, modify the file. Click OK to close the page
Click Apply then OK to complete the process
Now you have full ownership and permission on your file and folder.
Previously if you were getting file access denied now you will not get any of those warnings.
If you want to make your windows boot faster read How to Disable Startup Programs in Windows to get better boot time.
