Are you tired of having to pick up your phone every time you want to use Google Assistant? 😩 Did you know that you can also use Google Assistant on your Windows, macOS, or Linux computer? 🤔 That’s right! With just a few simple steps, you can access all the features of Google Assistant on your computer, including setting reminders, playing music, and controlling your smart home devices.
In this post, I’ll show you how to set up Google Assistant on your computer, whether you’re using Windows, macOS, or Linux. We’ll guide you through the process step-by-step, so you can start using Google Assistant on your computer in no time. So, whether you’re working on a report 📝, watching a movie 🍿, or just browsing the web 🌐, you can now use Google Assistant hands-free on your computer. Let’s get started! 💻
In this article
Use Google Assistant on Windows, MacOS, Linux
The setup and Installation process needs to be done only the first time,
If you have multiple computers then you have to do the setup once, for each new computer, you can reuse the existing credentials if you want.
📥 Download and install the app
First, download the app from Github Repo.
Visit the Github release page of the GA Unofficial client page and download the app for your system and Install it
If you like you can use CLI to install the app too
Windows (using winget)
winget install "g-assist" -eMacOS (using brew)
brew install --cask google-assistantLinux (using snap)
sudo snap install g-assist🔧 Setup Actions on Google
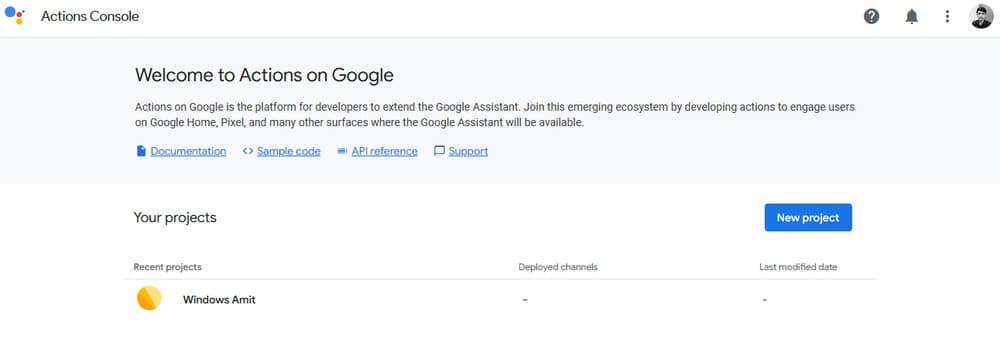
Follow this 👉🏻 Detailed step-by-step guide with images to set up your project.
Here are the steps you will be doing while following the detailed steps above
Create Project in Action Console
- Open the Actions on Google Console in your web browser and create a new project.
- Once the project is open look for the word “Are you looking for device registration? click here” and follow the link
- Now you are on Develop -> Device Registration page,
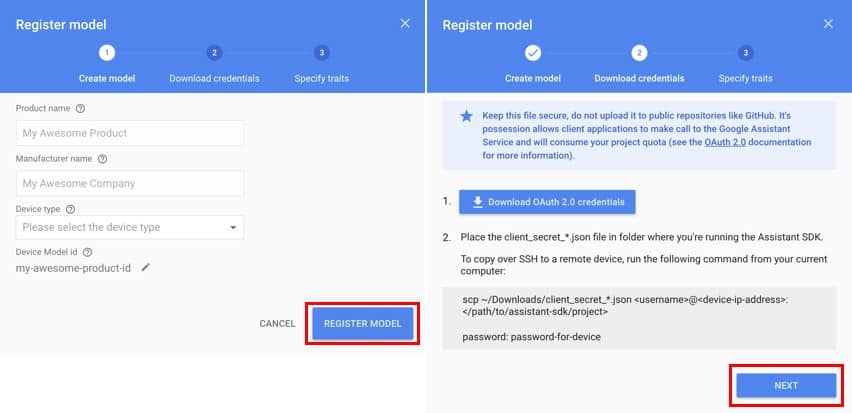
- Click the “Register Model” button
- Enter your device details in the popup opened and click “Register Model”
- You will be prompted to download your OAuth 2.0 credentials, skip it. Click the “Next” button
Configure Consent Screen
Now visit Google Cloud Console and select the project you created in the step above,
to open the “Select a project” popup click on the dropdown option next to the Google Cloud logo on the top left side of the screen.
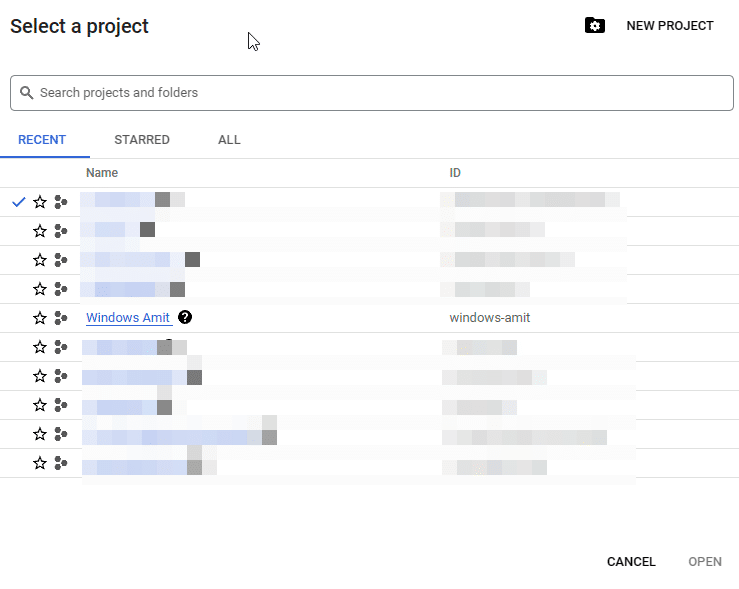
- Now open the sidebar menu and select “API & Services” -> “Library” or use a direct link to visit the specific page,
- Direct link to API Library
- Direct link to Google Assistant API
- Enable Google Assistant API, while enabling API make sure you are in the correct project if you visited a direct link.
- Now visit “API & Services” -> “OAuth consent screen”
- Direct link to the OAuth consent screen
- Set User Type to External then click Create
- Now enter all basic details like your email for support, save and continue
- in the Test Users section add the email id you will be using with Google Assistant,
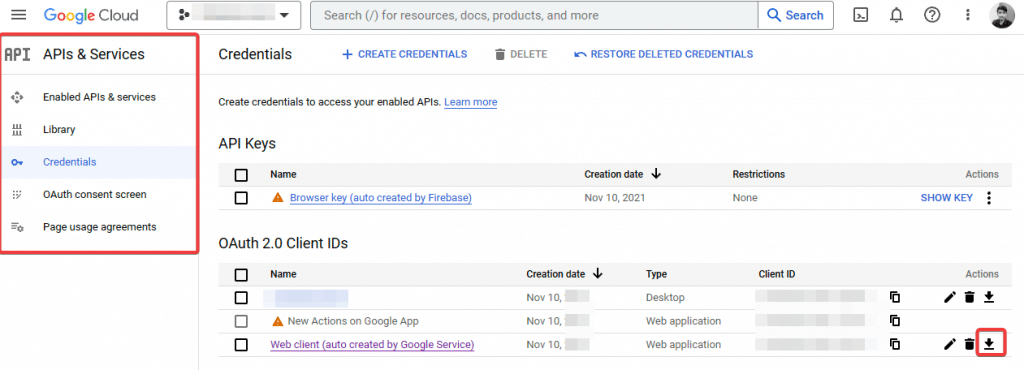
- Now visit “API & Services” -> “Credentials”
- Direct link to the Credentials
- Select the “Web client (auto-created by Google Service)”
- Update Authorized redirect URIs to the following URI “http://localhost:5754/auth/handler” and click save
- Now come back to the Credentials page and click on the download icon next to “Web client”, from the popup click the “Download JSON” button
🔑 Enter Credentials in the app
Open the app on your device and open the settings page and enter the credentials you got in the previous step.
- Select the “key file path” where you stored it, and make sure to move this file from the download folder to some other safe folder.
- “Saved Token Path” leave empty and click Save button
- Now relaunch app
This will allow the Google Assistant App to access the Google Assistant API Library through your created project.
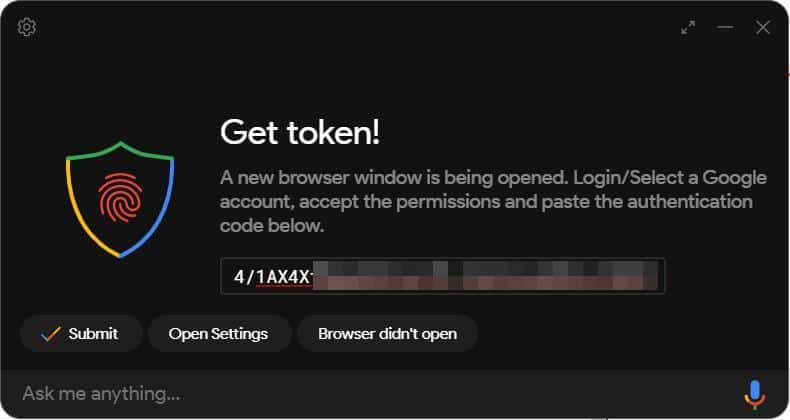
🏃♂️ Run the app and enter the access token
👨💻 Login into the project: You will be prompted to log in to the project you created in step two. Even though the app is not verified, logging in is safe because you created it yourself.
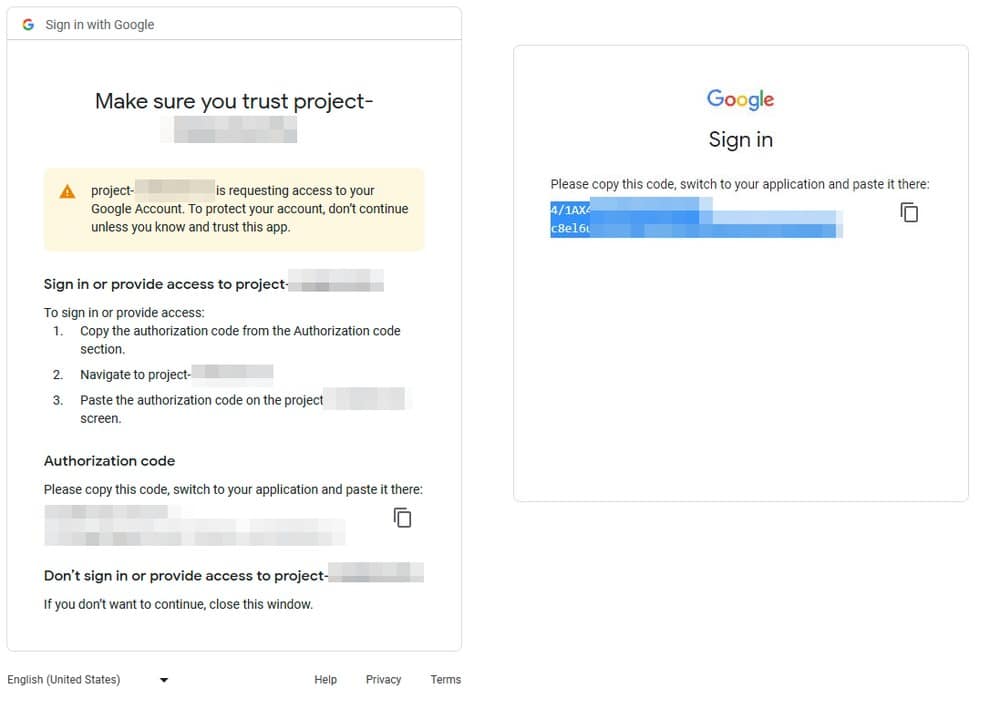
📋 Copy and paste the access token: Once you have logged in, copy the access token provided by the app and paste it into the prompt. Then restart the assistant, and the app will be ready to use. 😀
Google Assistant is Ready
Now if you are still here, then congratulations to you🎊

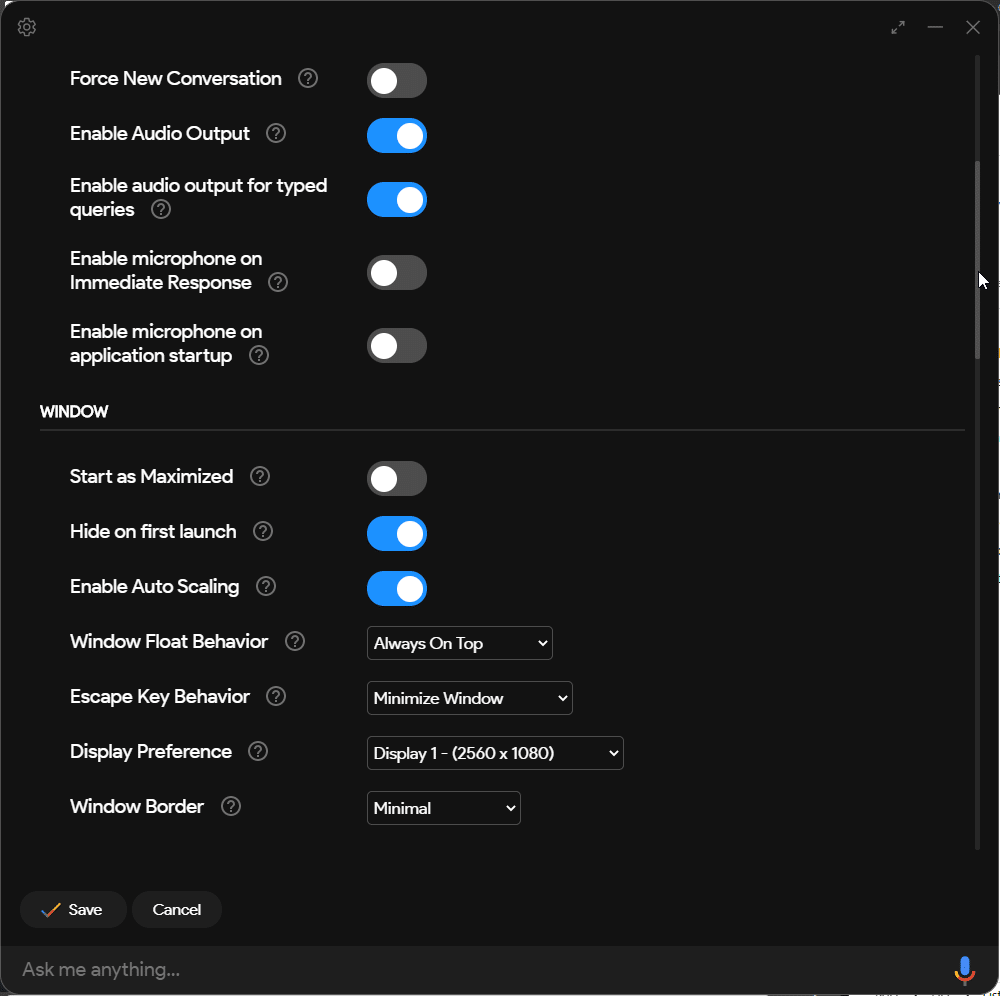
Few things you should customize in Google Assistant on your PC to make it easier for you to use it.
- The default shortcut to launch Google Assistant is Windows + Shift + A . You change it in settings.
- Enable/Disable “Hey Google” hot word detection, enable it if you want it to be hands-free experience but it will continuously keep the microphone access on.
- Enable/Disable Audio Output, also for typed queries
- Settings related to the microphone
More setting you should check and customzied
Task for Google Assistant
Here are some task that you can do with help of Google Assistant
- Set Reminders and alarms
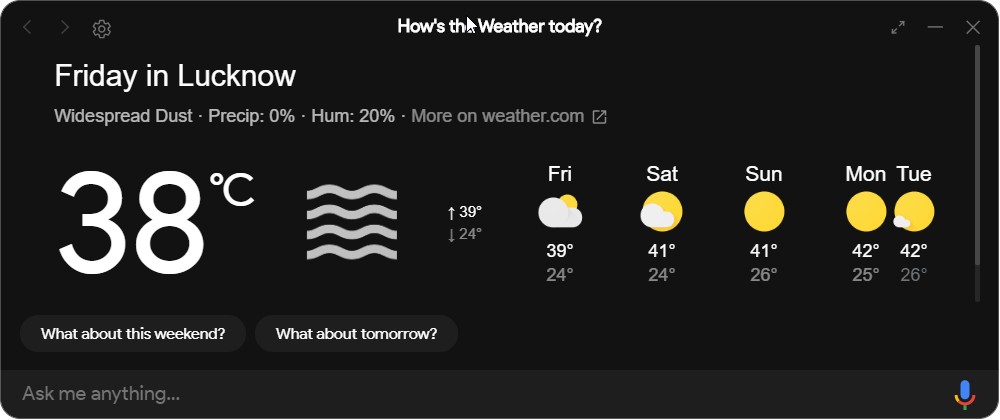
- Check the weather
- Play music and podcasts
- Get information about any topic
- Control your smart home devices
- Get fast translation of words and get the meaning of words
- Play some small fun games.
Conclusion Now you know how to install and use Google Assistant on any computer wheter it is Windows, MacOS, or linux, do share this post with your friends who always love to use Google Assistant everywhere.
