YouTube is the largest video search engine in the world and every day millions of people watch videos daily.
Every day thousands of new video is uploaded on the platform to stand out and give timely info people create Live streams that run 24/7.
Creating a live stream to 24/7 on YouTube is now easy and takes less than 30 minutes to set up.
But for this, you need to prepare ahead of time and you should have your content planned for the future.
In this article
Prerequisite for Live Streaming
You should have following things prepared so you don’t have to do last moment work,
Video Content – Image, Gif, Looping Video or live feed from any event, You should make sure you can access that on the remote desktop computer.
Audio – Live stream needs music to keep stream a pleasant experience for viewers, If your video already has audio then you don’t need to do anything for this.
Title and Descriptions – You should have a great title and description, don’t forget to put important links and credits in your description. Also, add video tags to your video.
Software and Tools – Make yourself familiar with the software and tools you will need during the live stream and make sure to run them locally on your local system first.
For streaming, I am going to use OBS in this post you can choose any software you like Streamlabs, StreamElements.
Server with Windows OS – To install OBS you need to have Windows OS installed on the server so you can easily install all software needed,
Before creating server do check how much power your stream will need like CPU, GPU (needed for video decoding encoding), RAM and storage,
For 1080p 24/7 Lo-Fi Music Live streaming where only image and gif is used as video source and audio is looped, you can use a server with 2 CPU, 512 MB GPU, 4GB RAM with 50GB storage easily (Performance will vary server to server).
But if your stream is using a video as video source then you need higher CPU and GPU for encoding and decoding.
Setup Server
Make sure you have gone through prerequisite before going through setup server options
You can choose any VPS server or dedicated streaming setup provider from the following list
- Ohbubble
- Paperspace
OhBubble
Ohbubble is popular and ofter first choice for setting up 24/7 Live streaming server,
They provide a dedicated server that comes with pre-installed OBS and Streamlabs and optimised for streaming,
All you have to do is setup your content in the software and hit Start Streaming button that’s it.
Ohbubble offers 4 plan each plan specifically mentions streaming quality, frames and type of content can be used in a streaming setup like video, gif, image.
| Plan | Limit | Monthly |
|---|---|---|
| Platinum Plan | 1080p at 1 FPS | $29.99 |
| Sapphiere Plan | 720p at 30 FPS | $39.99 |
| Gold Plan | 1080p at 30 FPS | $49.99 |
| Diamond Plan | 1440p at 30 FPS | $69.99 |
If You choose ohbubble then your server is already set up, just access the software by following the instruction provided by ohbubble team,
And also make sure you don’t tweak the streaming settings of the server yourself always contact support staff for this.
Paperspace

Paperspace is not ohbubble alternative its better thant that in every aspect.
Paperspace provide fully managed windows servers with GPU that can be used for resource-intensive works, they are not like VPS servers which are optimised hosting websites not for streaming live 24/7 that is bandwidth-intensive.
For setting up a server for 24/7 live stream I am going to use their Paperspace Core product that offers Licensed Windows 10 servers with GPU (Nvidia Grid GPU),
I am personally used Paperspace with Air Plan to stream 24/7 Live stream on YouTube
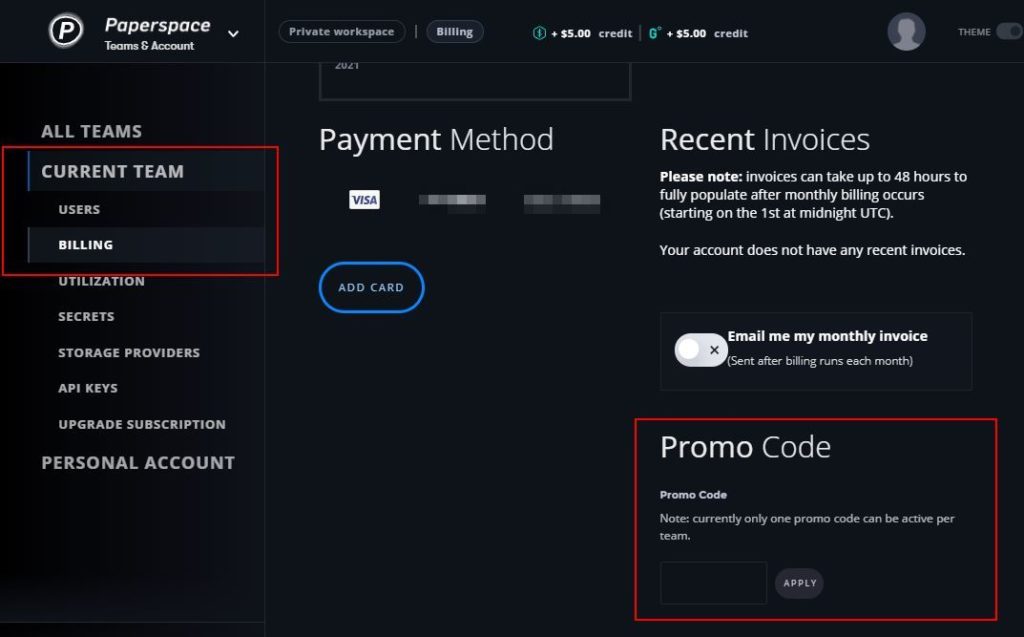
You can get $5 as Credit if you Redeem code JIOSBVD or
if Promo code won’t work use other’s promo code with quick Google Search
https://www.google.com/search?q=paperspace+referral+code&tbs=qdr:y
signup using the following link console.paperspace.com/signup?R=JIOSBVD
(Totally up to you if you want $5 as credit or not)
| Plan | Hourly | Monthly |
|---|---|---|
| Air Plan | $0.07 | $22 |
| Standard Plan | $0.10 | $35 |
| Advanced Plan | $0.18 | $65 |
| Pro Plan | $0.32 | $120 |
Storage fees ($5 for 50 GB) will be charged in the hourly subscription but in a monthly plan storage fees is already included.
If you just want to test any server while not committing for a full month you can go for an hourly subscription.
After deciding which plan you are going to use head over to https://console.paperspace.com/machine/create to create a Windows Machine.
Server creation will take some time so be patient,
When your Windows machine is created and ready to use you can access the machine directly in the browser or using the Paperspace Desktop app. When Windows machine is up and running you will like this.
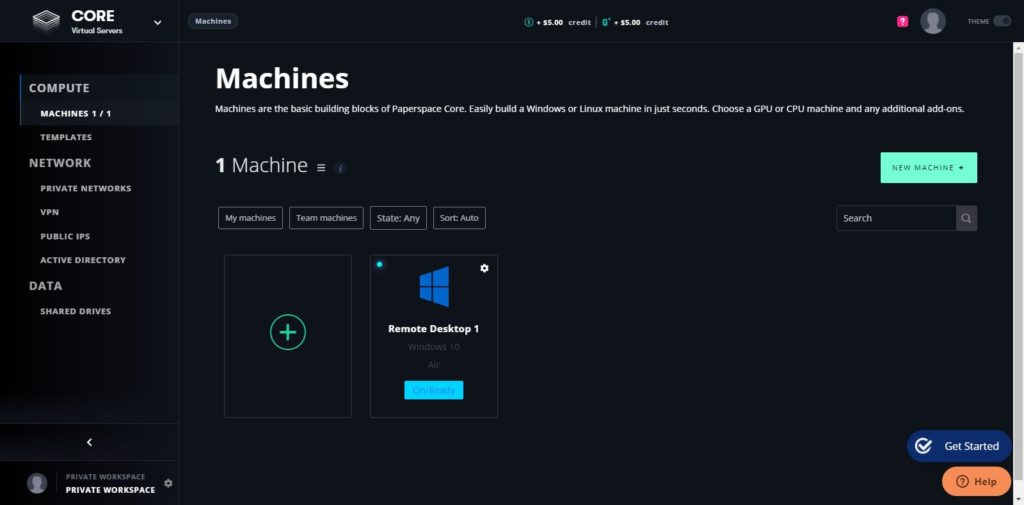
You can see below how a remote desktop will look like when you access it,
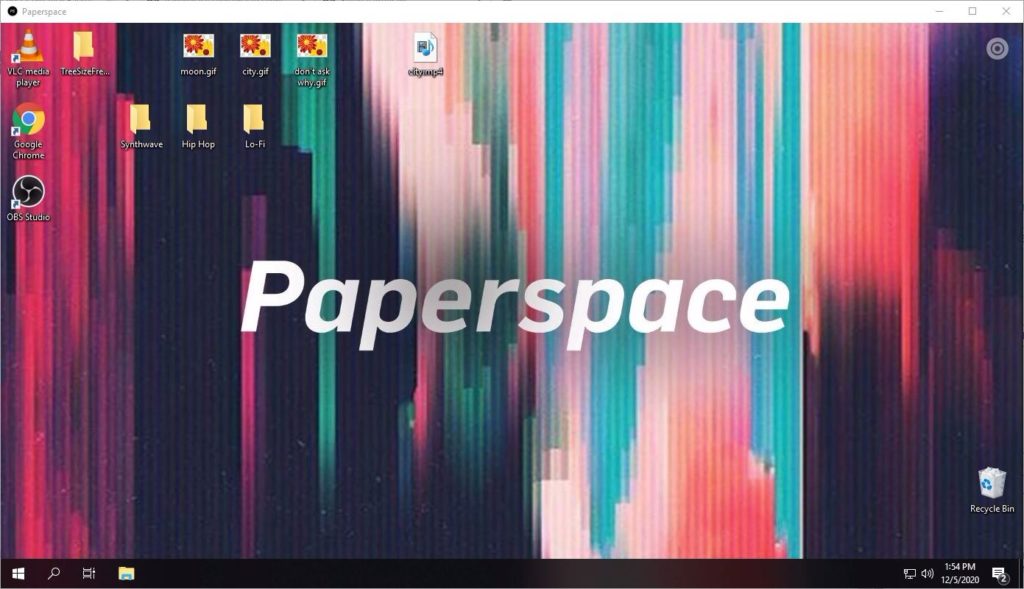
I have installed OBS and VLC player 64 bit already,
Make sure in your Paperspace console autoshutdown is set to blank otherwise your server will be shutdown after that time.
So first you should install both software and then we will setup OBS for live stream
Setup OBS
Depending on what you are going to stream setting up OBS steps will be different,
Following setup are for 1280×720 live streaming at 30 fps where GIF has used as a background with 300+ audio songs that are looped over and over again.
If your system has more power and you want to stream in higher quality then do tweak settings mentioned here.
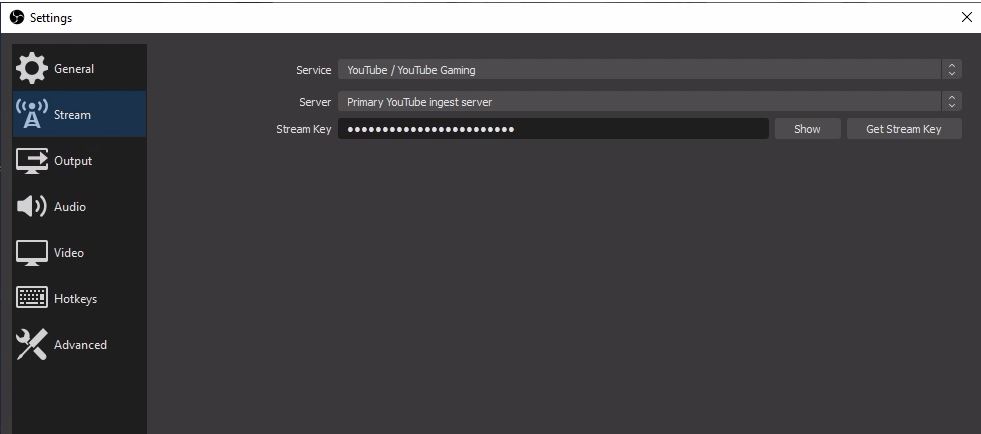
In Settings > Stream Select YouTube as a service, Primary YouTub ingest server as server and paste the Stream key,
You will get stream key from https://studio.youtube.com/channel/UC/livestreaming or https://www.youtube.com/live_dashboard_splash
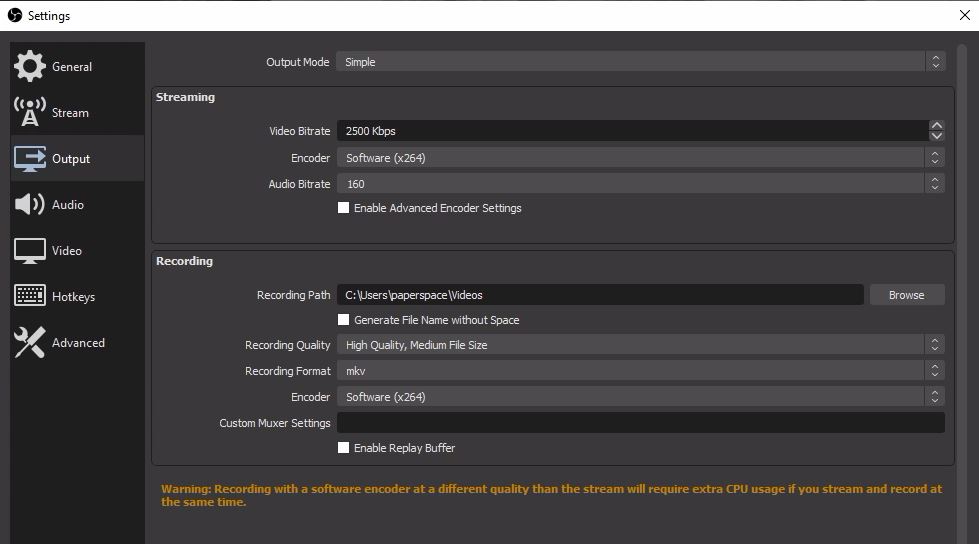
In Settings > Output Select Software(x264) from Encoder as Hardware (NVENC) won’t work on Paperspace server
In Settings > Video select Base (Canvas) Resolution and Output (Scaled) Resolution same value and leave the Common FPS Valuse with 30
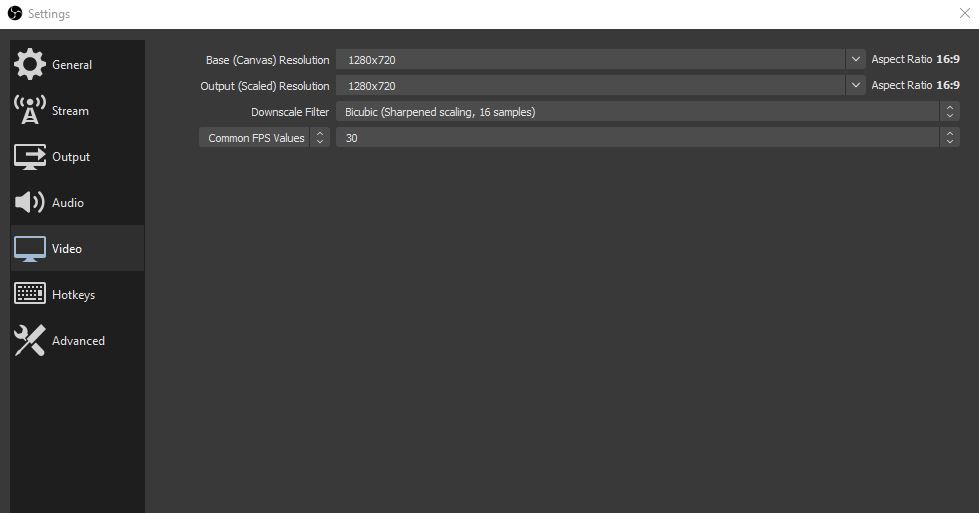
Now basic setting is being done so lets jump and setup Scenes
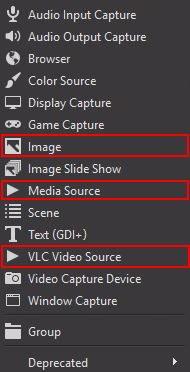
In Scene > Source we will be using the hilighted sources
- For GIF use Image Source
- For single Video & Audio file use Media Source with loop selected in settings
- For more than one Audio file use VLC Video Source with loop selected
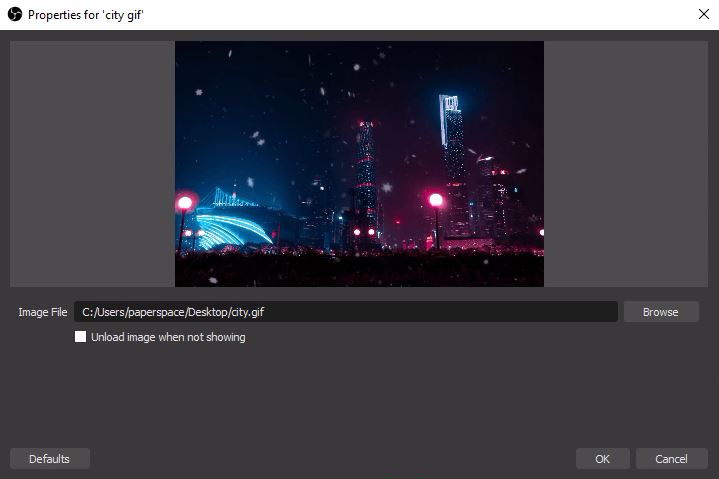
Select “Image” from the source list and browse and select the gif file you are going to use since it’s a gif it will loop again and again nothing to setup.
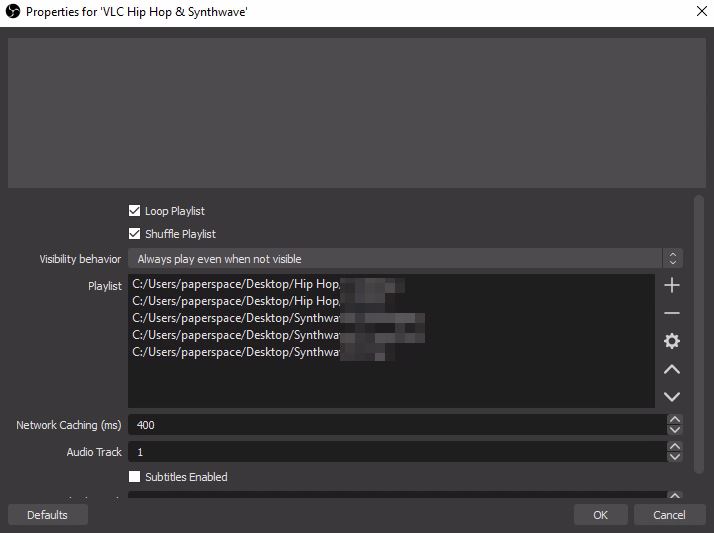
If you have single media file (audio or video) you can use the “Media source” from source list but since I have to select directory full of audio files I am going to use “VLC video source”
Make sure to check the “Loop Playlist” option and also select Visibility behaviour “Always play even when not visible”
VLC video soruce option is only going to show in the list if VLC 64 bit is installed.
Now mute all other audio source from Audio mixer to make sure no other sound is passing to your stream,
When satisfied from everything just the stream, don’t forget to set your stream to private if you want to just test the current setup, also before disconecting from server minimise the OBS to taskbar.
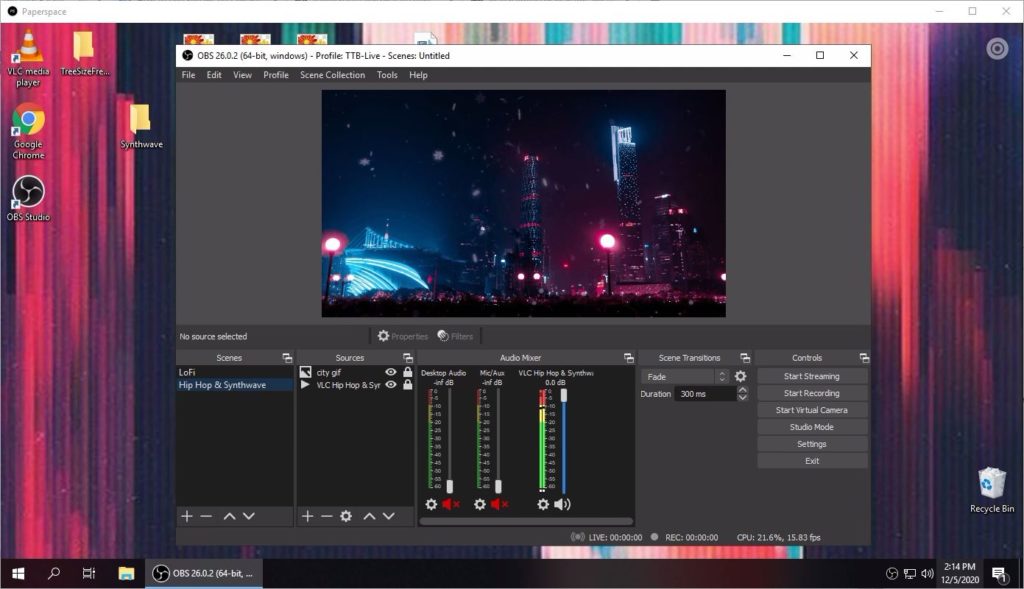
Now your setup is ready for stream, you can now start the stream😃 but don’t forget to setup backup server.
Backup Server
Like you set the Primary server you need to set up your backup server too in case your primary server goes down for any reason.
First, create a new server and setup OBS with just one change.
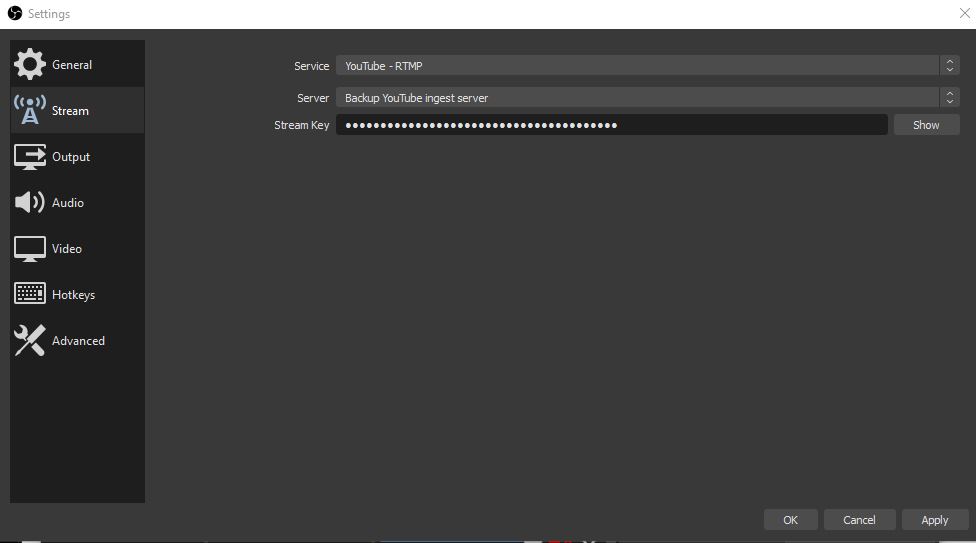
In Settings > Stream Select YouTube as a service, Backup YouTub ingest server as server and paste the Stream key,
Start Streaming
Now you set everything perfectly you can start your stream.
Once streaming is started you just need to make sure everything is running as it should be and resource available on server are enough.
If you feel any problem with anything just let me know, I will try to help you.
