Have you ever thought you can turn your handwriting into font, you can then use that font on your Microsoft Office documents, spreadsheet, system font, every place which supports installing the custom font.
Isn’t it cool you have your own handwriting as font or you can say you have a unique font that no one else has access too. To convert your handwriting into font there are many online font making websites are available (I will list them below) for the sake of simplicity I am going to use Calligraphr.com in this article to create a custom font.
In this article
Turn Handwriting into Font
Visit Calligraphr and Create an Account
Yes, you need to create an account on Calligraphr.com you can always use a temporary email service like 10minutemail.net to create an account if you don’t want to give up your personal email id,
Sign up is required to keep your all custom font safe in a single place, so you can edit them anytime form any device as you like.
In Calligraphr you can create free font as many as you like but you can have only 1 font in edit at the moment. To create a new font you have to delete your old font.
Download and Print Font Template
Now you have an account, it’s time to download the Font Template in which you have to write all the letters to create a font.
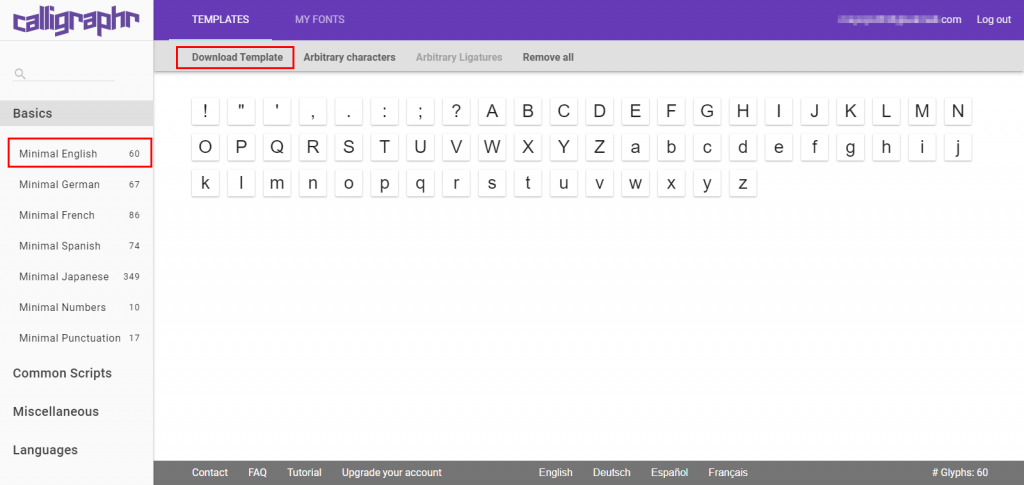
Font template can be downloaded after selecting Language from the sidebar, you have few options ( Minimal English, German, French, Spanish, Japanese, etc) choose according to your language, I have chosen English as this is the only language I know from the list.
After selecting Language you will see letters that will be included in your Font Template,
You can remove letters or add more letters from other languages as you like. I am going to keep these letters
now click Download Template
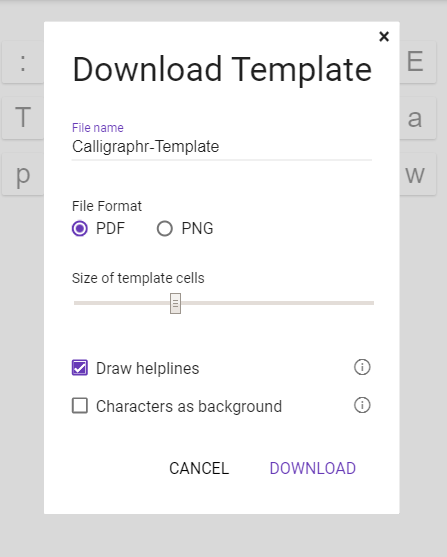
Now a small popup will open with few options,
You can leave everything on default options and download the template.
If you want you can change the font template file format from PDF to PNG as you like, You can also change the size of the cell in the font template by using the slider.
After adjustments print the downloaded font template.
Scan and Upload Font Template
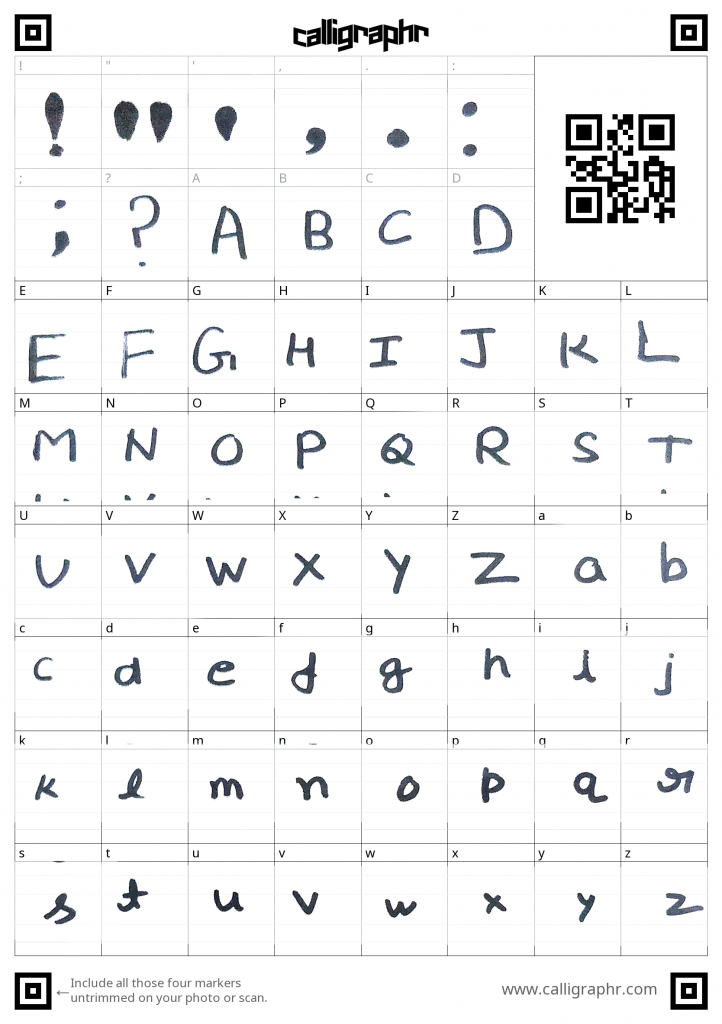
You now have a Font template, Fill the letters in every cell, every cell has small indication which letter needs to be written in that cell.
A complete form template will look something like this (ignore my bad handwriting though)?
After writing down letters in each cell scan the filled font template with the scanner if you have one or you can use any other scanner apps like one offered by Google Photoscan.
While scanning keeps in mind that don’t mess with QR code on the top right corner of the font template.
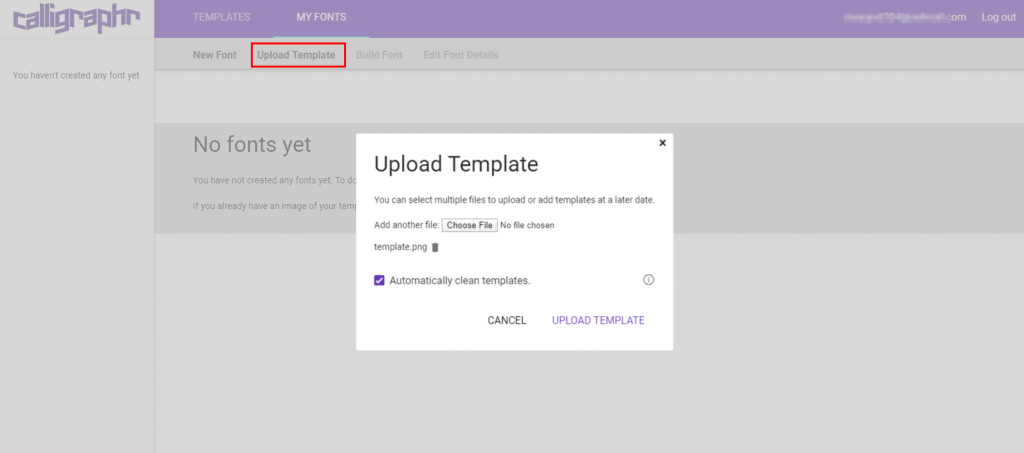
To Upload the Font Template, go to My Font tab and select Upload template
After upload, you will see Calligrapher will automatically extract all the handwritten letters and will also adjust the lighting, contrast to make it clean.
You can always upload another variant of your font template and delete old letters,
But in our case, single template upload is enough,
Build Font
Now It’s time to build the font, Building the font is easy,
In My Fonts tab, click on build font and give it a name, the same name will be used to select the font when you install that font on the system to choose that name correctly.
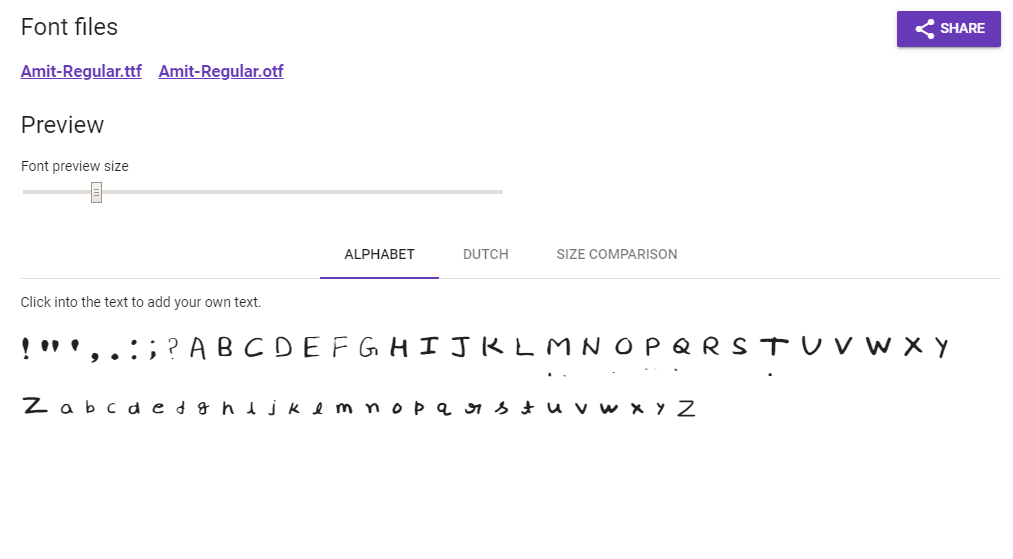
After Font is built you have 2 formats of build font ready to download, you can download anyone like
In general, OTF is better than TTF.
Install Font and Test
Installing a font is very easy, just double click the ttf or otf font file you downloaded, a new window will open with details and preview of font, click install and that’s it font is installed.
You can now verify that font is installed or not by opening a word document and select the installed font from the list and start typing.
Now you have made your handwriting into a custom font.
Adjust the Baseline of Font
There is a good chance you won’t be happy to see the font if you didn’t properly write letters in font template following lines,
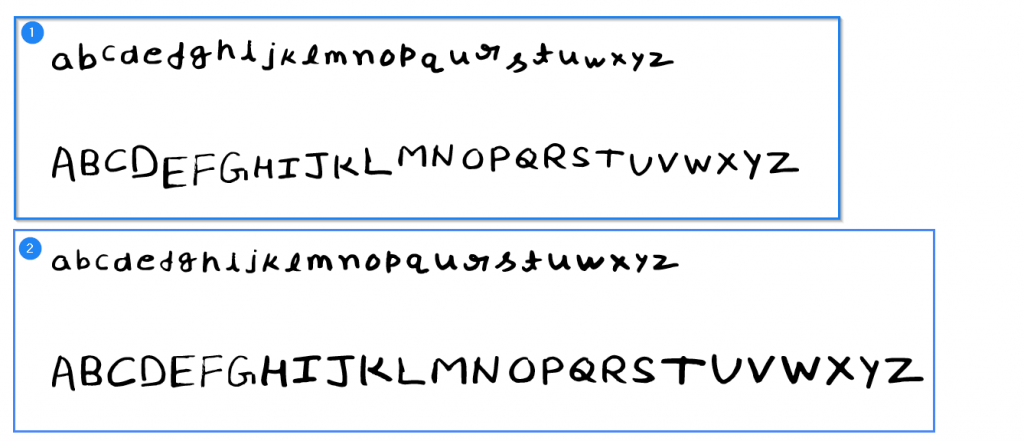
Some letters might be not aligned properly, as you can see in the screenshot below,
The first box is where the baseline was not adjusted, in second box baseline of letters was little manually adjusted.
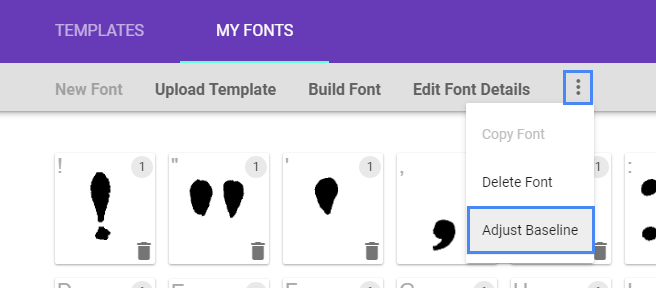
To fix this you just need to head back to My Fonts tab in Calligraphr and click on three dots in the right side and select Adjust baseline
After that, you can select any letter you find not aligned properly with baseline,
Keep all the capital letters aligned and sized properly with each other, align all small case letters with all small case letters,
You can move letters up, down, and adjust the size of the letter.
When done adjusting, click save adjustments and now go back and generate the font again to see if the result, don’t forget to name the new font with the same name to replace the old installed font.
Adjust and Tweak Individual Font Letter
After adjusting font there may be the case some letters have some dots, lines here and there overlapping or letters don’t feel clear to you or you just want that letter to rewrite,
You can always customize individual letter of font,
Go to my fonts tab, click on the letter you want to tweak, select edit character, or you can copy the character to create a variant of that letter and do editing on that character.
You can erase any part of that letter, paint again on the go, do adjustments as you like just don’ forget to click save and close after that.
Conclusion
Creating a font from handwriting is very easy it takes less than 15 minutes to create a brand new custom font from scratch.
You can use this same process to create your custom font with emojis, photos, symbols anything you like because this is your custom font.?
I hope this post helped you.
